Here's How to Convert Olm to Pst in Mac in 5 Simple Steps
One of the best ways to deal with emails is a desktop based email client. Web browser based clients are fine to access your emails from anywhere, anytime. But they don't allow much functionality for properly managing the complete data.
One of the best desktop based email clients on Mac is Outlook 2011. It has an extensive list of features that extend way beyond what other ordinary clients offer. It also offers a feature to export and archive your data to an Olm file to store in your local hard drive for future uses. This system of backing up your data has been proven to be very helpful.
However, that's not the only use of an Olm file. You can also share it with others via email or other file sharing means and easily share thousands of emails via just one file. It is also used when you want to convert your data to transfer to other email clients within Mac or other platforms. Such as – converting Olm to Pst to move to Windows Outlook.
Which brings us to our main subject of the article. How can a user easily convert Olm to Pst in Mac?
“Olm to Pst Converter Pro” offers 5 simple step method to do that
When it comes to third party software to convert Olm to Pst, you might find many. But it's important to chose one that has the ability to properly convert data without any loss of integrity.
Gladwev Software brings such a tool that has what it takes to convert Olm files to Pst. It also offers a nice graphical wizard to guide user to do what needs to be done in an effortless way.
Below are the simple 5 steps to convert Mac Olm to Windows Pst –
But first, you need to export data to Olm files from Mac Outlook. To do that, go to –
- File → Export
- Check “Outlook for Mac Data File (.Olm), and check the items you want to export.
- Choose if you want to delete the items or not after the export.
- Select a location where you want to save the Olm file. And click 'Save'.
Once it's done, launch “Olm to Pst Converter Pro” and follow the steps written below.
Step 1. Load Olm files

Click on “Add Olm files” button, and go to the location where you saved your Olm file, and select it.
Step 2 – The tool will show you all the folders inside the selected file, as
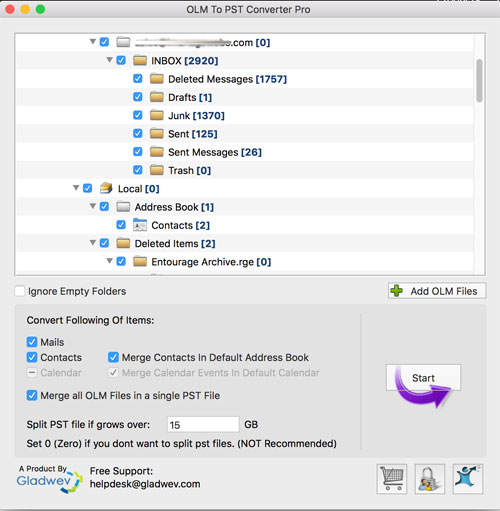
shown in the figure below. And select the folders you want to convert.
Step 3 – Check other options and settings.
- You can filter the content based on types, such as, mails, contacts, and calendar. Check the box for what you want to convert, and uncheck what you don't.
- Merge contacts in address book
- Merge calendar events in default calendar
- merge all Olm files in a single Pst file
- specify maximum allowed size for Pst file, and the tool will split the file into two if it grows over it.
Step 4 – Click 'Convert'. Once the conversion has started, it will show the progress box as shown in the figure below.
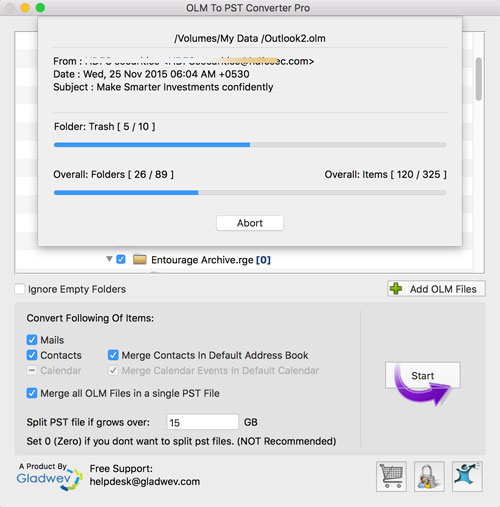
Depending on the size of the Olm files selected, it will take few minutes to complete. If you want, you can abort the process by clicking the “abort” button.
At last when the conversion is done, it will show the brief report, a direct
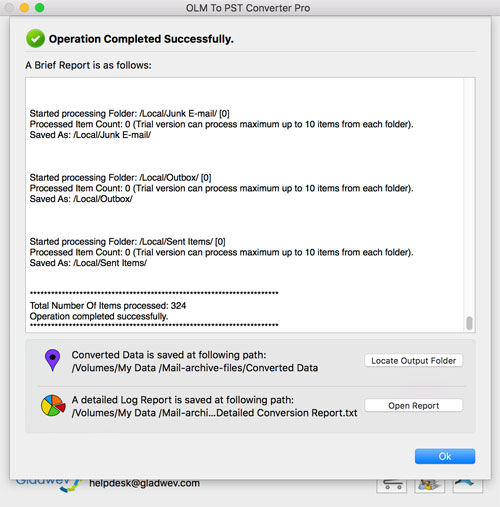
link to locate the converted Pst file, and a link to read the full report.
Click “Ok” to finish.
“Olm to Pst Converter Pro” for Mac is a highly sophisticated piece of software for Olm to Pst export, but with an interface that's designed to target basic every day users and not experts.
Download it's free trial version, if you want to give it a go. It will give you access to all the features (merge Olm files, split pst files, folders preview, etc.). However, it will limit the conversion to 10 items from each folder.
The links are given below
.